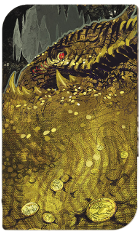
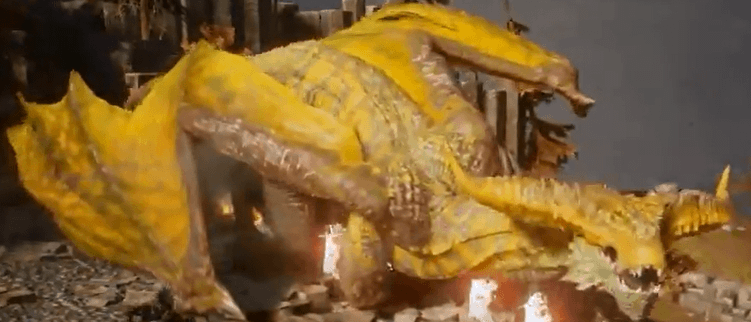
 Ferelden Frostback is one of the 10
High Dragons in Dragon Age 3: Inquisition. You will acquire the
Wyrmslayer Trophy/Achievement if you kill all ten of them.
- Recommended Level: 12+
- Creature Type: High Dragon
- Location: The Hinterlands (Lady Shayna's Valley)
- Resistance: Fire
- Vulnerablity: Cold
- Abilities:
- Matriarch: The dragon summons dragonlings to join the fight.
- Fire: The dragon inflicts fire elemental damage; it can be countered by cold.
- Rewards: Superior Belt of Focus, Grand Enchanter's Staff, Superb Amulet of Constitution,
- Rewards: (amount of each is random) Intense Dragon Blood, Dragon's Tooth, Dragon Webbing, Dragon Scales, Dragon Bone
- Rewards: 2941 XP, 1600 Influence, +4 Power
Damaging the limbs of a dragon so that it is severely bleeding will prevent the dragon from performing swipes with that limb, making life easier for melee characters. Damaging a pair of limbs will cause the dragon to fall down to that side, opening it up for increased damage and preventing it from attacking for a duration.

Ferelden Frostback Guide by Manki (from this thread)
Obviously to start off, this is by no means the best or fastest way to defeat this Dragon, however it was done, completely inside the game limits. So if this helps anyone nab their first dragon kill then I will be happy and feel like I helped out my fellow Inquisitor.Some disclaimers, I play on Nightmare, with Friendly Fire turned off, because I dont like to break keyboards. So this is not the hardest the game will ever be, but its pretty close. I also play on PC, so sorry console users, if I name a button or a command that you dont have, please just use your brain and deciepher it. Im not about "PC Master Race" I did play both DA:O and DA2 on Console before DA:I. I also do not EVER use tac cam, and not just because its terrible on PC, but I never have. The closest thing to that is what I call the Tactical Pause. I will occasionally pause the game to issue a command to a party member, mostly this is used for Tonic and Grenade use.
Party Composition
Myself (Level 14) - Archer Rogue w/ Poisoned Weapons and Archery Talents. I am a Tempest however I actually havent put any points into it yet (I know I'm terrible)
Cassandra (Level 13) - Sword and Board Warrior w/ Full Vangaurd and Sword and Shield Talents. Nothing into Templar yet.
Dorian (Level 13) - Mage w/ Full Spirit and a smattering of Lightning/Necormancy Talents.
Solas (Level 13) - Mage w/ Full Spirit and some Lightning/Frost Talents
This is by no means meant to be an optimal party composition, again, this is how I did it and I hope it will help others out in their quest. If interested I will reply with actual Talent builds should people want it.
Combat (Phase 1) - Run like Hell
Spoiler
When you first meet the Dragon north of Dusklight Camp, youll notice a tower behind him and some foliage surrounding the area. In addition to the Dragon, some Dragonlings will be present and even though their level states 12, I found them much easier than another level 12 counterpart. However do not be distracted, the reason the title of this phase is Run like Hell, is because thats what you do. At least 2 deaths happened over the course of my playthrough by trying to get the beast to land and fight me.
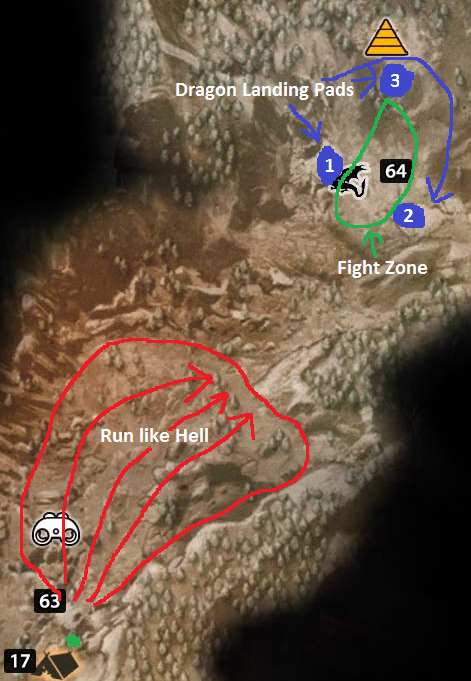
When you enter the area, and the Dragon flies off, just, Run like Hell. Ignore any other monsters, ignore loot, just RUN. After passing the small tower structure in the middle of this area you will notice a small pond, with another "Tunnel"/"Overhang" just beyond it. Once you reach this pond, the Dragon will stop shooting fireballs of death at you and fly past this area to the next. Simply clean up any remaining Dragonlings that followed you, top off, and get ready for the showdown.
If done perfectly, you wont need to heal at all, if you are me, youll have to use either a potion or two, or a regen. Also this intermission was a very good point to build some Guard on Cass, trust me she (or whoever your tank is) will need it very soon.
Combat (Phase 2) - Fire is Bad, even Friendly Fire
Spoiler
Now that we have healed up, killed some Dragon babies we walk through the tunnel and meet the Dragon again, this time he (probably she actually) is waiting for you in a nice open area. When seeing this the first time I literally facepalmed at my deaths during the aforementioned Run like Hell phase, because its very clear this is where we are meant to fight.
Step 1 Inquisitors, get into melee AS FAST AS POSSIBLE, it doesn't have to be you, but your tank should move as fast as possible towards the dragon. If you do not, those lovely fireballs of death will start to decimate your party in very short order. Once a character is in melee combat, the Dragon will cease to shoot fire balls, but gains three new features: Melee attacks, Fire Breath, and what I can only call Wing Beat
Using my party, Cass made it in to melee in very short order which was good, and the rest of use took up positions where the mages could hit Cass with Barrier, without being in melee range. Was actually one of the proudest moments of DA:I's AI I'm sure. After a bit of tank and spank, the Dragon Fire Breath was actually not a terrible issue, UNLESS it caught one of the mages. Even then, barrier was more than enough to keep them up, and the Damage over Time element of the breath is not long enough to worry.
Now here is where the issue started, Wing Beat. This ability is the bane of squishy parties like my own. The Dragon will gain a circle around it looking like wind, and will pulse at a interval. Every pulse causes moderate damage to every individual in the party and attempts to drag you closer to the Dragon. The only way to avoid this ability, is to hide behind something(Been inside the wind circle also negate the damage), like a tree or a rock. However in the battlefield this fight is taking place in, there are very few, if any options to avoid this attack. As a Rogue with decent health, I could take every pulse with no barrier, however my mage friends required barriers to survive. Even at perfect timing the mages will still take 1 or 2 hits from this ability. This is where the regen pots came in handy, since the main focus was not on the mages, and amazingly they were using barrier properly, they were easily able to be full health before the next Wing Beat ability went off. Once or twice one of the squishies would die due to bad positioning after the Wing Beat and getting smacked by a Fire Breath or Melee attack. But with 2 mages, both having revive, this wasnt the worst thing to ever happen.
Now the reason this phase is named such, this is a FIRE Dragon, therefore any abilities or damage types that are fire based, he will be immune to. I know this seems like common sense, but it needed to be said.
Rinse repeat above until 75%, then we enter the next phase.
Combat (Phase 3) - Run like Hell, AGAIN
Spoiler
Yep you guessed it, at 75% the dragon will leap into the air and attempt to rain fire down upon you. As a non tac cam user, my best strategy was to spam the disengage command, and run around attempting to dodge fireballs. After 1 or 2 fireballs, the dragon will land, but not in the middle position. So lets take a moment here to descirbe our battelfield.
On the left and the right of the Dragon as you enter the field, there are inaccessible plateaus, during his flight phase, after she drops a couple fireballs, she will land on one of these locations. When she does, you should move the whole party to just below the edge of these locations. There is a slight ledge in which you can all take cover and not get any more fireballs. Treat this as another small intermission, heal grenades work wonders during this time as your party is all together and relatively safe. Again, just as in the original Run like Hell phase, make sure you hit the Disengage command so your party follows you to the safe area.
After a brief pause, the Dragon will leap off of the plateau and land back in the middle of the field.
Combat (Phase 4) - Rinse and Repeat
Spoiler
There is actually 0 change in the fight at this time, if you need the strategy for it, see Phase 2 - Fire is Bad, even Friendly Fire. Damage the Dragon down to 50% and we can progress to the next phase.
Combat (Phase 5) - Run like Hell, but Hide Fast
Spoiler
Combat (Phase 6) - Rinse and Repeat, after Dealing with the Babies
Spoiler
Again, there is not change in her abilities for this phase, however it is very important that you kill the smaller Dragonlings before focusing on her. We dont want them alive when we move on to the last phases of this fight. Damage her down to 25% and we can move on. I.E. See Phase 2 - Fire is Bad, even Friendly Fire.
Combat (Phase 7) - Run like Hell, for the last time!
Spoiler
At 25%, the Dragon will yet again leap into the air and rain fire from the sky. Nothing changes in this phase except the fact that we know where she is going to land this time. Behind her as you entered the arena, there is a medium sized hill that actually has a path to the top. after her fireballs are spent, she will fly to this location (North for those of you directionally challenged) and land. She will still perform the Scream ability, however if we are safely at the bottom of the hill, there is no need to worry about it. It will still spawn adds, but if you are fast enough, you can actually get up the hill without engaging them. As they spawn somewhat far away from your location.
Now before we enter the last phase this is important, try to not all run up the hill at the same time. The area up on top is much smaller than what we have been fighting in, so its going to be a bit more cramped, also there is only one path to her, and it creates a natrual choke point. It very well might happen that all 4 party member run up the hill into a Breath attack, and I dont want to hear about anyones TV/Monitors being shattered over this. You have been warned.
Combat (Phase 8) - The Final Showdown
Spoiler
The dragon after being bloodied and beaten is not very happy, she lands and sits quite close to the entrance of the hill, so be careful. If possible have the Tank turn her away from the entrance while the rest of your party positions themselves. I used gratuitous pausing here to make sure that people werent going to die for no reason. Little tip however, the area behind her on the hill is much more spacious than the entrance, if possible, try and get your ranged characters around her and into that area. It will save you much headache.
Essentially though, the Dragon is the same in this phase as any other ground phase. If you can survive the attacks you win! The only difference is the space in which you have to work with. Take your time and do it right. Also, enjoy your loot! As a level 14 Inquisitor I was pretty happy with the drops I recieved off this, my first Dragon kill.
Map - For those interested
Spoiler
 |
| HinterlandsDragonMap_zps6090203a.png |
Archer Rogue Tips
Spoiler
For those of you like me who want some tips specifically for Archers on this fight, Welcome! Couple of things to note:
1. Long Shot is your BEST Friend. More specifically, the upgraded version. While mostly useles in other fights, I found it invaluable in this one due to the multi hit box feature of Dragons. An example would be aiming at the head while standing behind the beast, or aiming at the far leg while on the sides. It caused me to push the phases much faster and use less resources in doing so.
2. Explosive Shot is not worth it. Fire Dragon + Fire Damage dont mix. Dont use it. The only reason I ever hit that button was to slow down the Dragonlings during those phases. Otherwise it was a useless talent.
3. Poisoned Weapons are mediocre. The damage dealt to the Dragon by the poison is not a whole lot, however if you have the upgrade you should still use it on CD to gain the damage bonus. I personally have 2 rings to increase the duration time by 60% total, so for about 80% of the damage phases, I had the increased damage. Your mileage may vary.
 Anonymous
You should really make these guides for the other High Dragons! I found this one funny AND helpful!

Load more

My loot, the dragon's skull spawned after the fight inside the final plateau, cannot reach it. Dang
1
+10
-1